Ref CR 02 · Craft How to create space art in Photoshop
Method Edition of 20/08/2026 also filed under: astronomical art, scene building
Space art: painting astronomical subjects so that they read as physically possible, which means the light, the colour and the shadow edges have to obey the same small set of rules every time.
In short
- Build from the back forward: black, stars, gas, body, atmosphere, foreground, grade.
- Stars are not white. Their colour follows their temperature.
- In vacuum there is no haze, so distance does not wash anything out.
1. What space art is
Space art covers everything from an accurate depiction of a known planet to an invented system painted for a book cover. The two ends share a discipline: the viewer has seen photographs from telescopes and probes, so anything that contradicts them reads as wrong even when the viewer cannot say why. Getting the physics roughly right is not pedantry, it is what buys the invented parts their credibility.
2. The build order

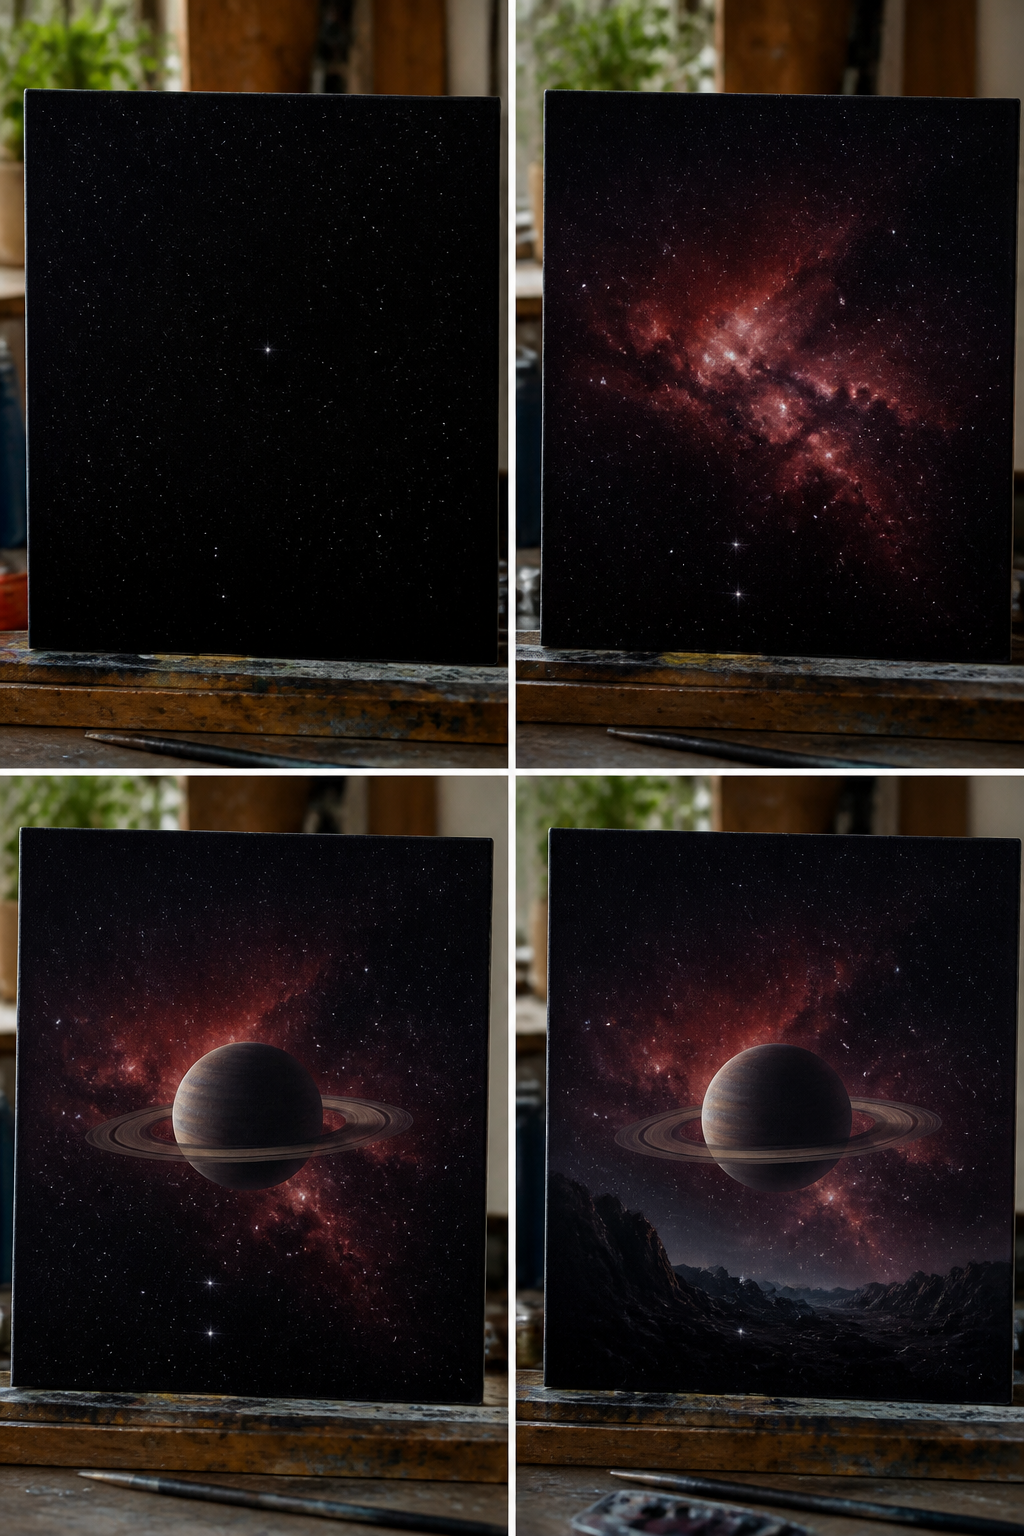
Work back to front, each stage on its own layer group, so that any stage can be rebalanced without repainting the others.
- Ground: a near black field, tinted rather than pure black.
- Star field: two or three passes at different densities and sizes.
- Gas and dust: nebulae, added on lightening blend modes, dust lanes on darkening ones.
- The lit body: planet, moon or station, with one clearly stated light direction.
- Atmosphere: the rim band, the scatter, the terminator softening.
- Foreground: silhouette elements that give scale.
- Grade: curves, a slight bloom around the brightest values, and a final contrast pass.
3. Star fields
A convincing star field is not one scatter of identical dots. Build it in passes: fill a layer with noise, push it hard with Levels until only isolated bright points remain, blur by a fraction of a pixel to take the aliasing off, then repeat with a different threshold for a second, sparser pass of larger stars. Set the layers to Screen, mask out the areas where the eye should rest, and add a handful of bright stars by hand with a soft brush and a small cross of light.
Then colour them. Stars are classified by spectral type, from hot to cool, in the order O, B, A, F, G, K, M. Hot O and B stars read blue white; A and F stars read white; our own Sun is a G type and reads yellow white; K stars are orange; M stars are red. A field painted with a scatter of blue white, white and warm points looks photographed. A field of identical white dots looks like a texture.
Keep the whole field dimmer than you think. Stars sit behind everything, and a star field competing with the subject is the most common beginner error.
4. Nebulae and dust
Gas is painted additively: build cloud shapes on their own layers, set them to Screen or Linear Dodge, and carve them with masks rather than erasing. Two or three hues at different scales read better than one, because real emission regions are patchy.
Colour has a reason behind it. Emission nebulae glow because hydrogen is being ionised and re-emits strongly in the red hydrogen alpha line at 656.3 nanometres, which is why so many of them are red or pink. Reflection nebulae shine by scattering the light of nearby stars, and because scattering is more efficient at short wavelengths they read blue. Dark nebulae emit nothing: they are dust, seen as a silhouette against something brighter, so they are painted by subtracting, on a darkening blend mode, never by painting black over the top.
5. Painting a planet
Start with a circle, filled flat, on its own layer. Establish the light direction and never break it. The line dividing day from night is the terminator: on an airless body it is nearly hard, and on a body with atmosphere it softens into a band whose width tells the viewer the atmosphere is there.
- Limb darkening: a lit sphere is not evenly bright. It falls off toward the edge, most visibly on stars and on gaseous bodies. Painting a flat disc is what makes a planet look like a sticker.
- Rim light: a thin bright edge on the far side of the terminator sells the sphere, and is physically the atmosphere catching light at a grazing angle.
- Atmospheric band: a narrow, brighter halo that hugs the lit limb, strongest where the sun is behind the body.
- Surface texture: map it so it curves with the sphere. A texture that stays rectangular across the disc destroys the form instantly.
- Shadows: rings and moons cast hard edged shadows, because there is nothing to scatter light into them.
6. Objects and their signatures
Each kind of object has a visual signature that a viewer recognises without being able to name it. Painting the signature is what makes an invented scene legible.
| Object | Reads as | Why | Painting note |
|---|---|---|---|
| Emission nebula | Red or pink cloud | Ionised hydrogen re-emitting at 656.3 nm | Patchy, with dark lanes cutting through it |
| Reflection nebula | Blue haze around bright stars | Short wavelengths scatter more efficiently | Brightest close to the star that lights it |
| Dark nebula | A hole in the star field | Dust blocking the light behind it | Paint by masking, not by adding black |
| Globular cluster | Dense ball fading outward | Thousands of old stars, concentrated at the core | Never a uniform disc of dots |
| Spiral galaxy | Bright core, blue arms, dust lanes | Young hot stars form along the arms | Arms are ragged, not drawn with a spiral tool |
| Comet | Straight tail plus a curved one | Ion tail is pushed anti sunward, dust lags behind | Both tails point away from the sun, not backward along the path |
| Airless moon | Hard terminator, sharp shadows | No atmosphere to scatter light | No glow, no rim band |
| Gas giant | Banded disc, strong limb darkening | Rotation drives the banding, depth dims the edge | Bands follow the curve of the sphere |
Wide table: scroll it sideways.
7. Mistakes that break the illusion
- Haze between the camera and a distant object. Vacuum has nothing to scatter light, so distance does not desaturate. Aerial perspective is an atmosphere effect; use it only inside an atmosphere.
- Two light sources with no explanation. One sun, one direction, unless a second source is visibly present in the frame.
- Soft shadow edges everywhere. A distant sun casts nearly hard shadows. The Sun is about half a degree wide seen from Earth, which gives a small soft border, not a blur.
- Pure black in the sky. A slightly tinted dark reads deeper than a flat black and leaves room for the darkest darks in the subject.
- Stars visible through a bright limb. Anything glowing brightly hides the faint field behind it.